Tutorial Details
- Software: Autodesk Maya
- Difficulty: Beginner/Intermediate
- Completion Time: 3-5hours
- Tutorial Files: None
Part 1 :
Step 1
To create the container we will need to have a reference image to match the shape of our container to a real one as much as we can. As I’m not allowed to include the image I used with the tutorial, head to the following link and choose a suitable reference image : Google Image Search. Once you’ve found a suitable image, save it to your hard drive. Then, back in Maya, look through the orthographic front view, in the view menu go to “View > Image Plane > Import Image…”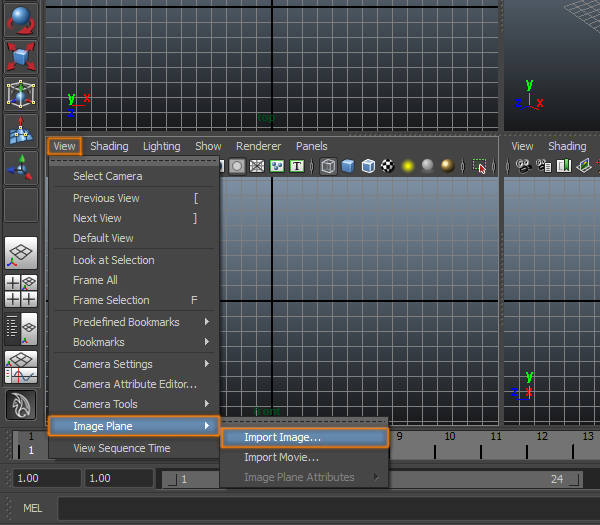
Step 2
The image you selected will be displayed as a background in the front orthographic view.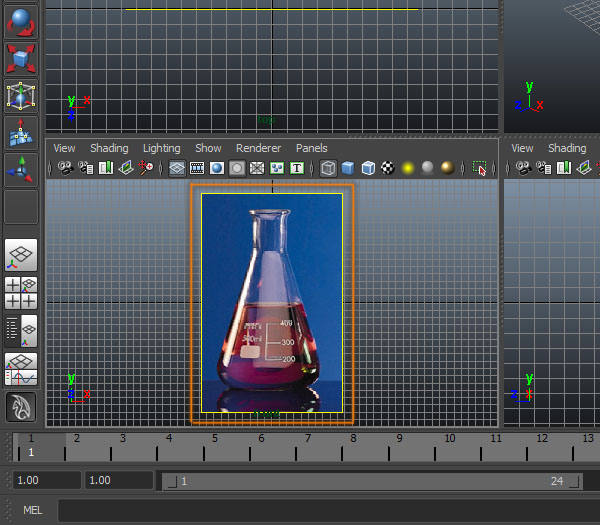
Step 3
If you go to the perspective view you will see the image as a plane, but we don´t want the image to be displayed in any other view that is not the front view. To hide the image go to its Attribute Editor, and check the “looking through camera” option.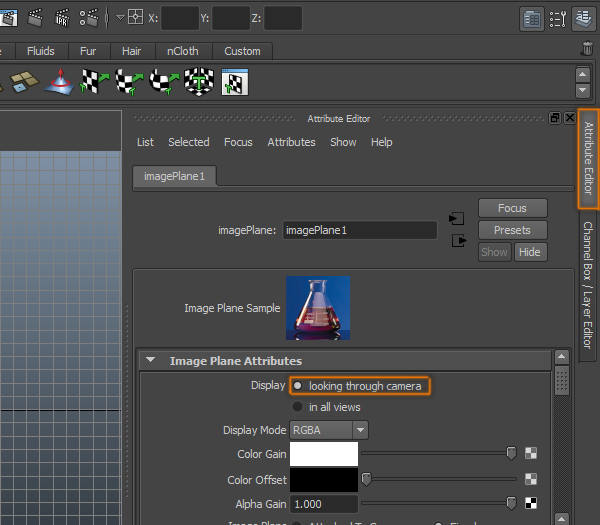
Step 4
While looking through the front view, go to “Create > EP Curve Tool”.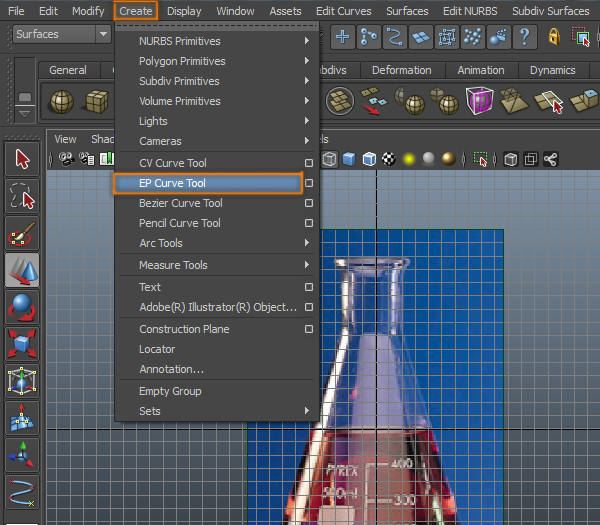
Step 5
Click on the “Tool Settings” button on the top right corner of the screen.
Step 6
Select the “3 Cubic” option inside the “Tool Settings” window of the “EP Curve Tool”. This will allow us to create a curve with round corners.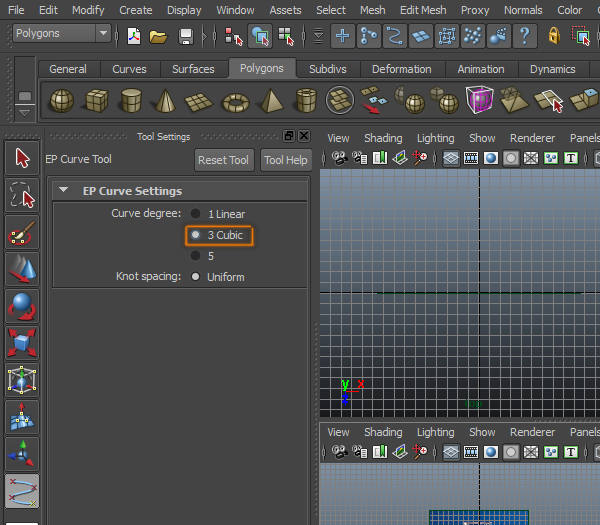
Step 7
Make a curve that matches to the shape of the container on the background. (Note you also need to match the shape on the inside of the container)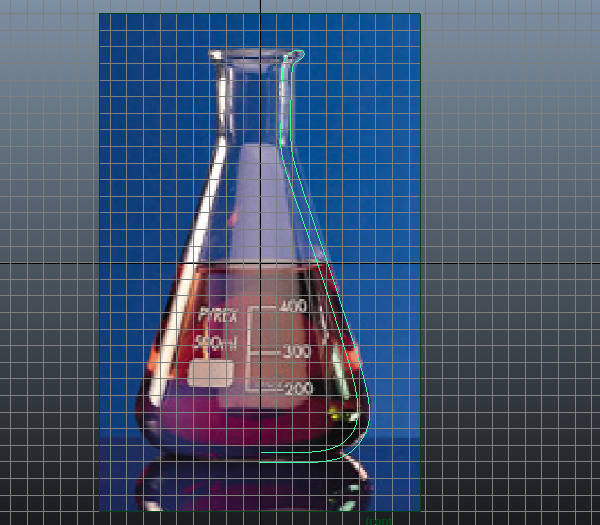
Step 8
At the “Surfaces” menu, go to “Surfaces > Revolve (option box)”.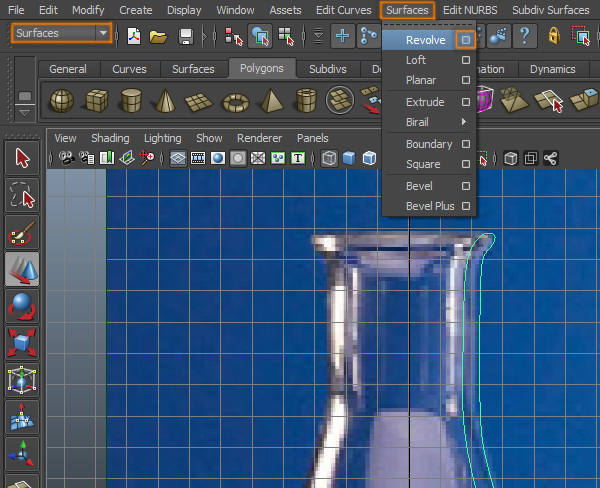
Step 9
Inside the revolve option box, increase the segments to 16, make the output geometry “Polygons” and the “Tessellation Method” to control points. (When need the object to be a made of polygons instead of NURBS because nDynamics only works with polygons)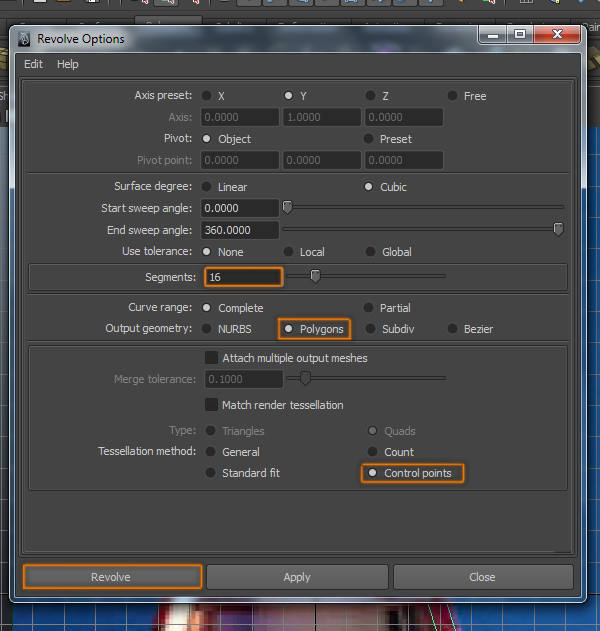
Step 10
When you click on Revolve, the curve we created before will transform into a polygonal container.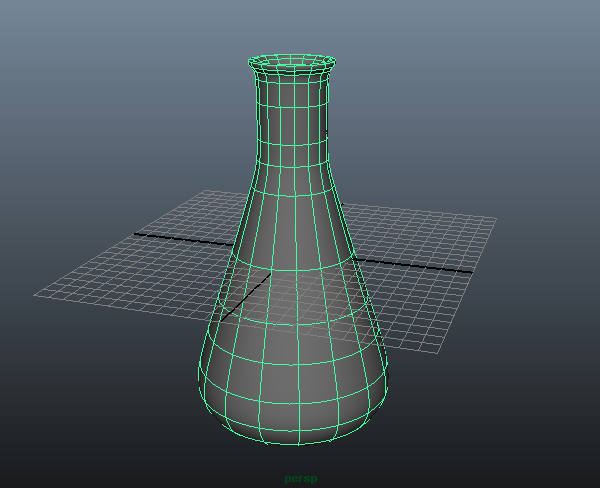
Step 11
Go to “Edit > Delete by Type > History”, this will disconnect the container from the curve.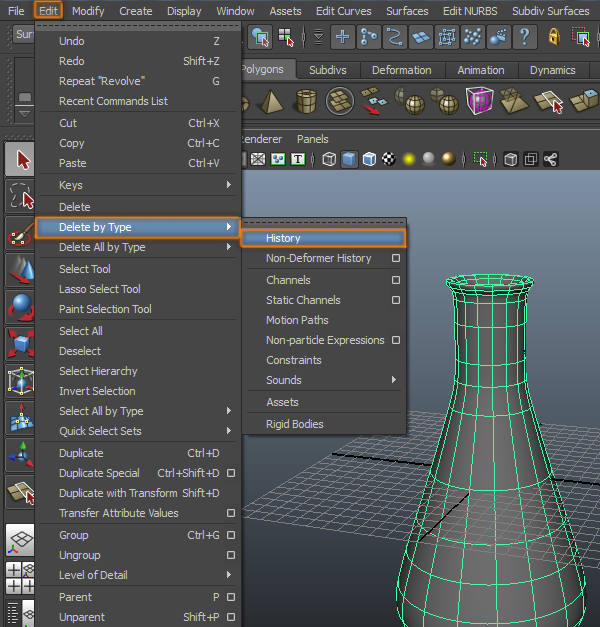
Step 12
Select and delete the curve. If you followed correctly step 11 the container should not disappear.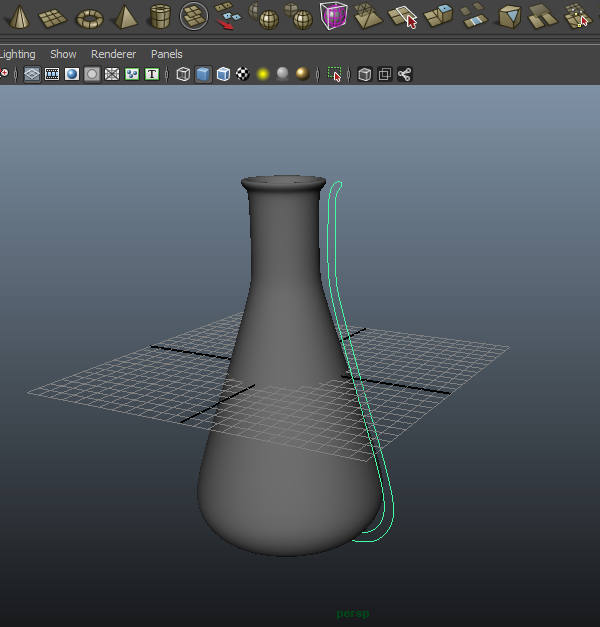
Step 13
Scale and position the container to the desired position.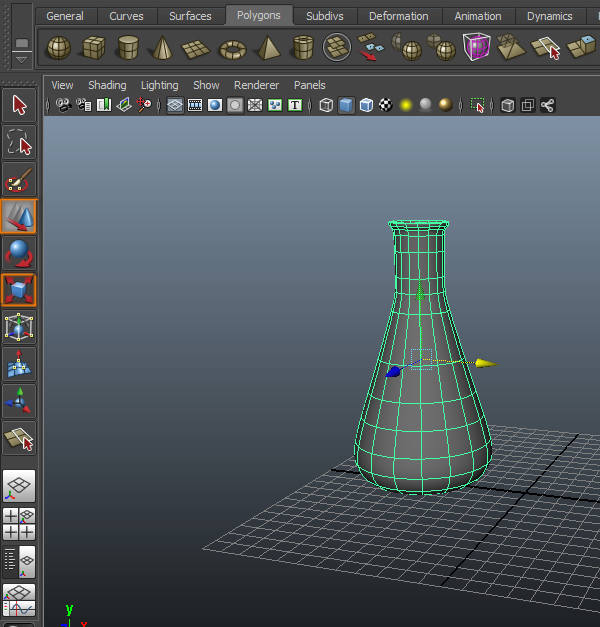
Step 14
Look through the Front View.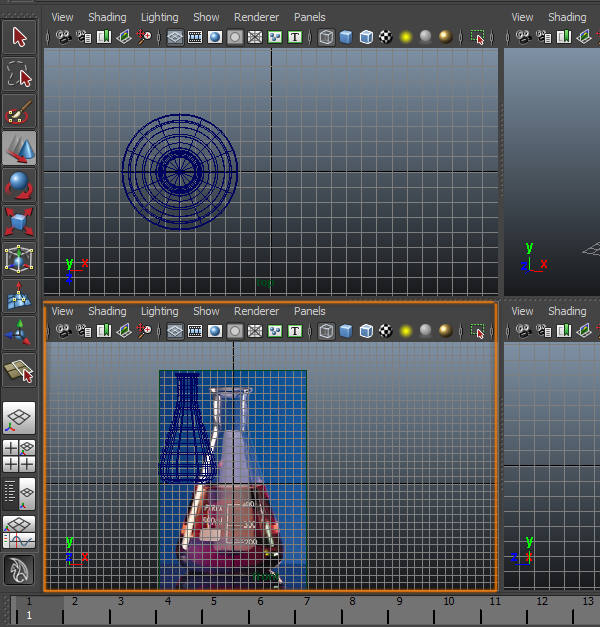
Step 15
Go to “Create > EP Curve Tool”.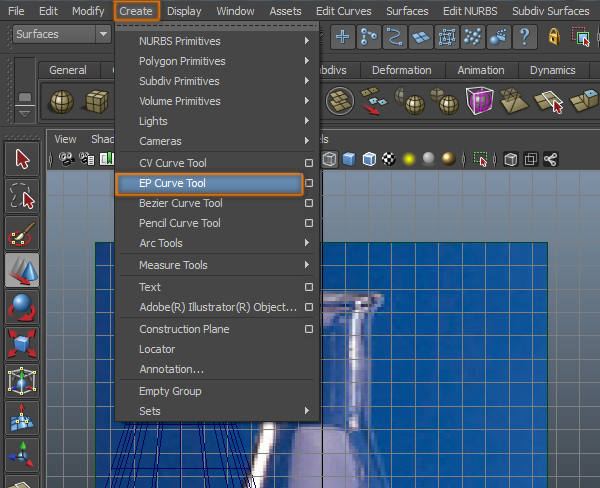
Step 16
Create a curve with the shape of our second container.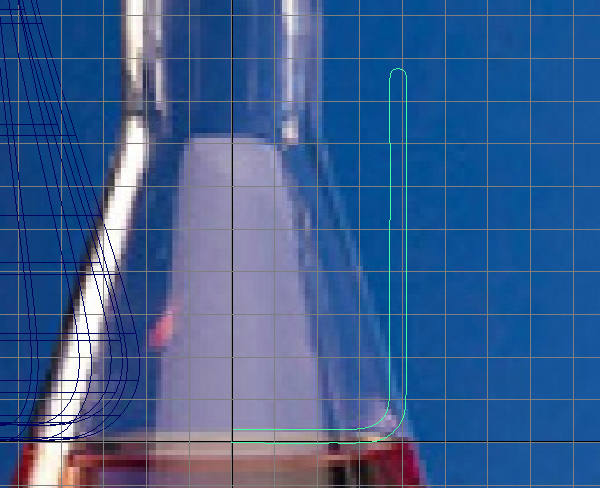
Step 17
Revolve the curve with the same option we used before.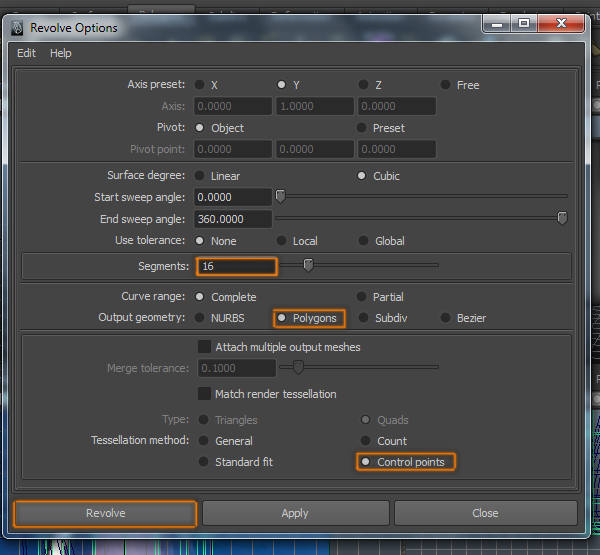
Step 18
Select the container.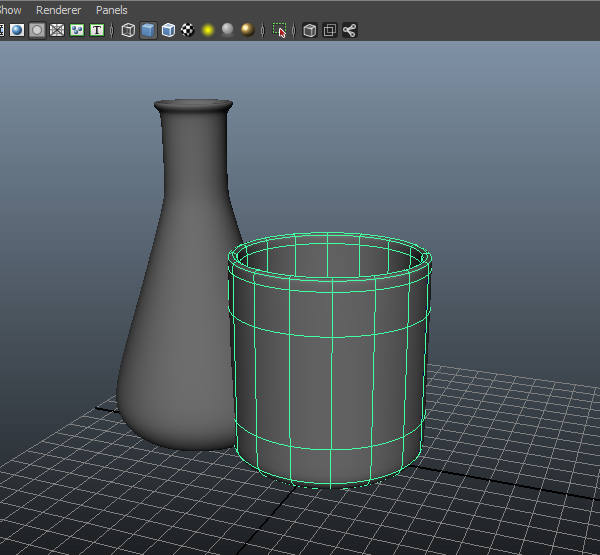
Step 19
Go to “Edit > Delete by Type > History”.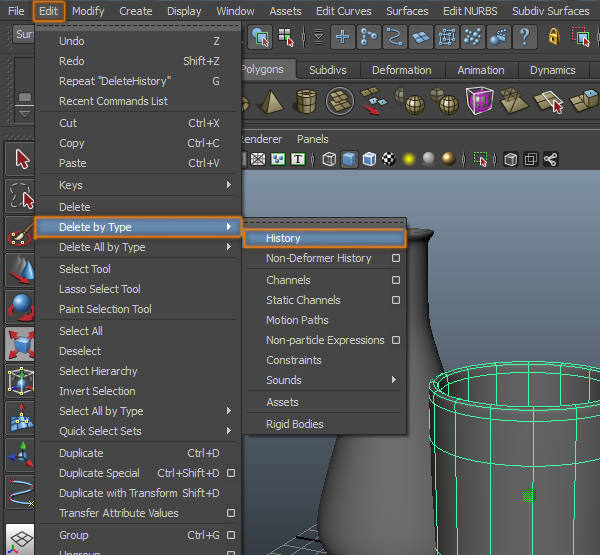
Step 20
Scale and position the container.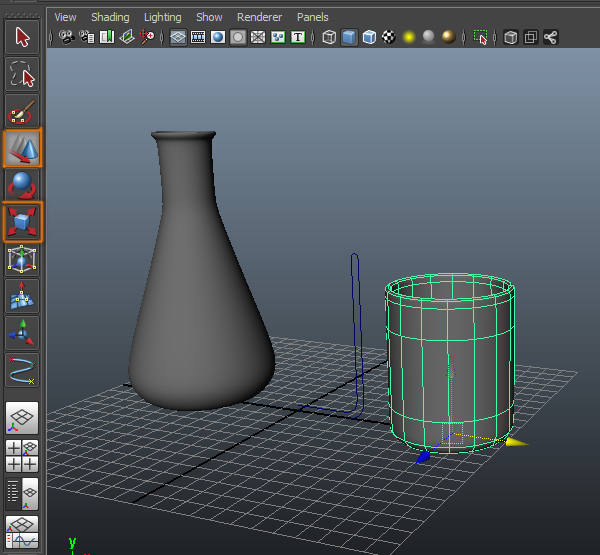
Step 21
Select and delete the curve.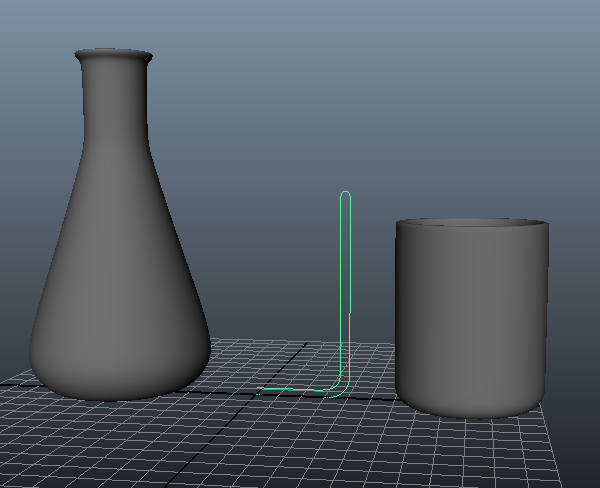
Step 22
Make the vertexes of the container selectable.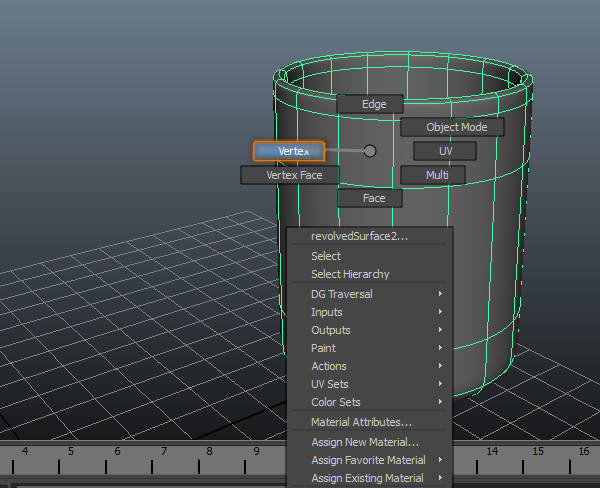
Step 23
Select the vertexes at the top of the container. (Also in the inside).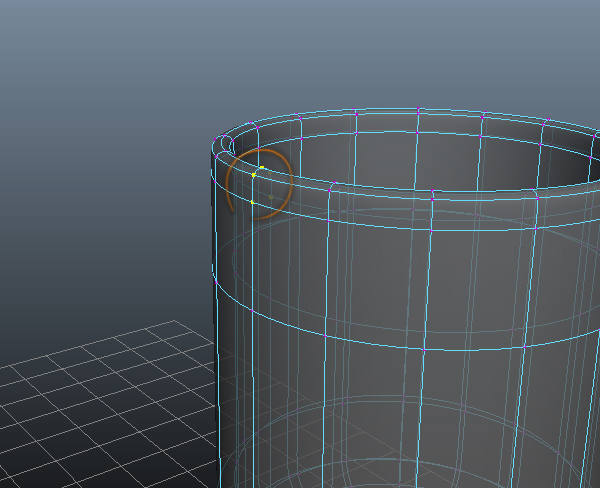
Step 24
Move those vertexes towards the outside the container.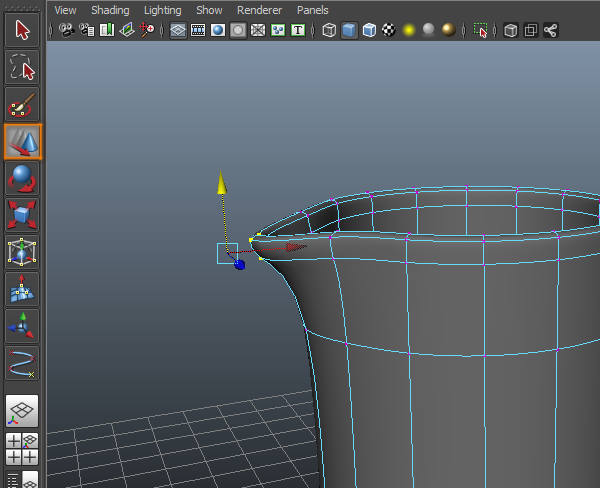
Step 25
With the container selected, go to “Edit Mesh > Insert Edge Loop Tool”.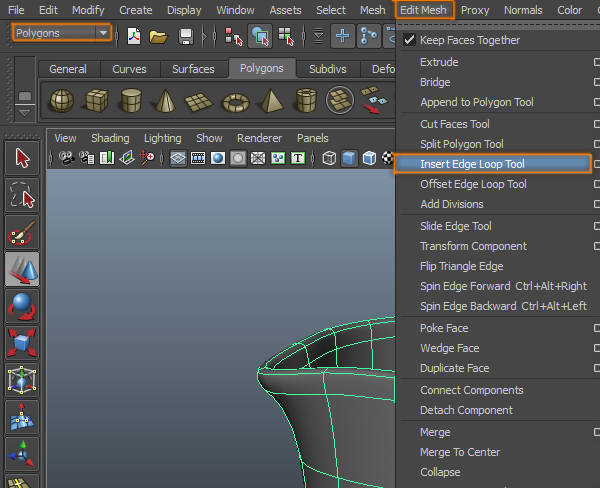
Step 26
Insert an edge loop just before the vertexes we selected before, this will polish the shape of the container. (Feel free to modify the shape of the container in your own way).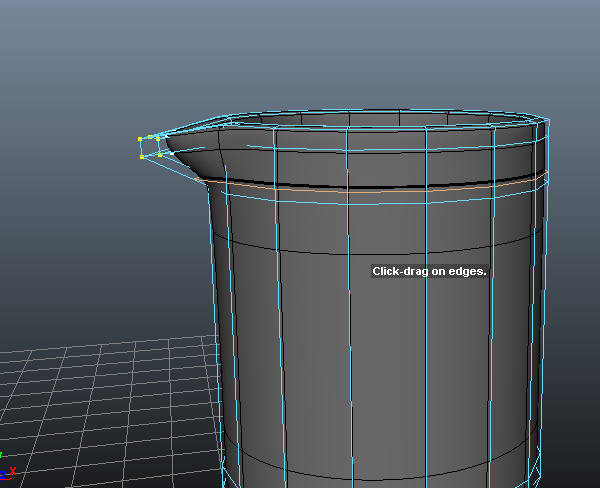
Step 27
This is how the container looks now.
Step 28
Make the vertexes of the container selectable again.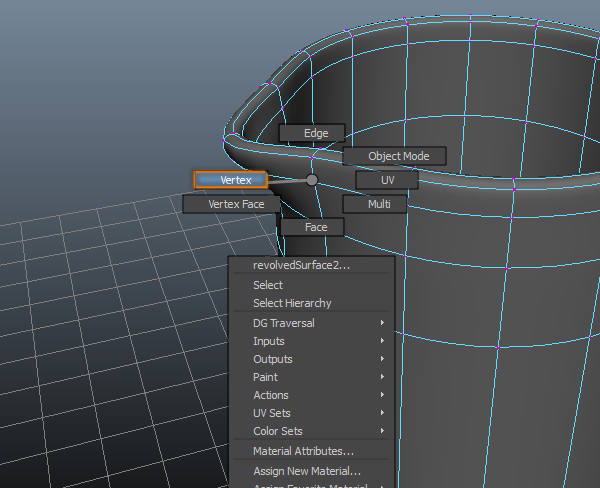
Step 29
Select the vertexes at both sides of the extruded section of the container.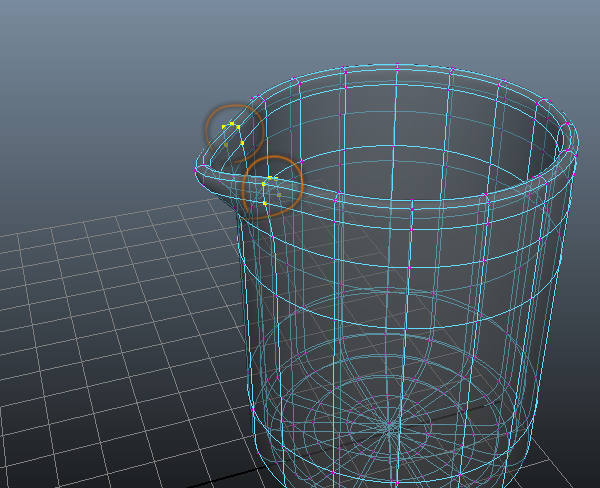
Step 30
Select the scale tool and scale the vertexes towards the inside of the container.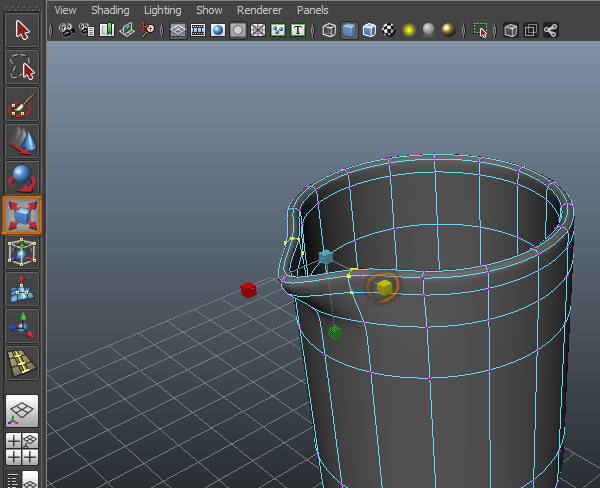
Part 2 is coming soon.......
No comments:
Post a Comment