Sunday, December 12, 2010

Maya Plugins are extensions for the 3d animation software Maya. There are plugins for many different areas such as modeling, animation and rendering. Some of them also interact with external applications (for instance renderers, game engines or other software packages).


Dynamics

Plugin compatibility description
Stroika   8.5/2008  Fields and Emitters
Blastcode   7.0/2009  Demolition (Nurbs)
Brainbugz    4/2008   Behavioral/Flocking
PullDownIt   8.0/2011      Dynamics & Fracture

Fluid

Plugin compatibility description
Glu3d     7/8.5  Fluid in realtime.
RealFlow    7/8.5/2008      Fluid & Simulation.

Import/Export

Plugin compatibility description
BodyStudio    4 - 7 Import plugin for Poser characters.
ActorX    6.5-2008 Export to .ase format, used with Unreal Ed and Unreal Ed for UT3
Collada    7-2008 Import/Export plugin for the Collada format, used with Unreal Ed and Unreal Ed for UT3 and most other 3D modelling software
.smd Exporter    4-2008 Import/ Export plugin for the .smd format, used for Source Engine model compiling.
Rapid Export for Maya   6.5-2010 (32 & 64-bit) Workflow tool to automate the export process to just a single click.
SketchUp Import for Maya 2009-2011 (32 & 64-bit) Import plugin for SkechUp models.
SolidWorks Import for Maya 2009-2011 (32 & 64-bit) Import plugin for SolidWorks models..

Modelling

Plugin compatibility description
natFX 7 3D plant modelling plugin.
T-Splines 7/8/8.5 T-Spline plugin.
Xfrog 6/6.5/7 Plant modelling plugin.
CurvedSpace 2008 CurvedSpace plugin.
Vertex Chameleon 6.5 - 2010 (32 & 64-bit) The ultimate vertex colour toolset for Autodesk Maya.

Texturing

Plugin compatibility description
UVAutoRatio 6.5 - 2010 (32 & 64-bit) Automatically unify UV to polygon surface area ratio across multiple objects
RoadKill 6.5 - 2008 (32 & 64-bit) Automatically unwrap UV's of complex meshes into a "pelt" for easy texture mapping
Unwrella 8.5 - 2010 (32 & 64-bit) Automatically unwraps UVs of meshes while preserving pixel proportions and surface stretch

Rendering

Plugin compatibility description
HDRI-Studio lighting system 8.0/8.5/2008/2009 Lighting environments for 3D-models.
RenderMan for Maya 6/6.5/7/8.5/2008/2009 Photo-realistic Rendered by Pixar.
3Delight for Maya 8.0/8.5/2008/2009/2010 Fast, Renderman compliant renderer by DNA Research.
V-Ray for Maya 2008-2011 A very fast and popular raytracing render engine.
Holomatix Rendition 7/8/8.5/2008/2009 Realtime, Progressive, mental ray-compatible raytracing Renderer
Turtle 7/8.5/2008 Raytracing renderer.
Maxwell Render 7/8.5/2008/2009/2010 The Light Simulator. Render engine. Multilight. Materials. Photorealistic...
Gelato/Sorbetto 7/8.5 2008 Nvidia Free GPU and CPU user render tool. Photorealistic Raytracing...

Autodesk Maya: Lighting and Rendering

Creating Natural Light

In this tutorial I'll teach you how to make a light rig that will generate a nice, clean, soft overall light that's tinted green.

Paint Effects

normally you don't use paint effects to light a scene, but here's an exception. We're going to use paint effects to generate a picture which will then be assigned to a sphere and sampled for Final Gather.

We're going to have to adjust the interface. Also, we're going to have to display the paint effects canvas.

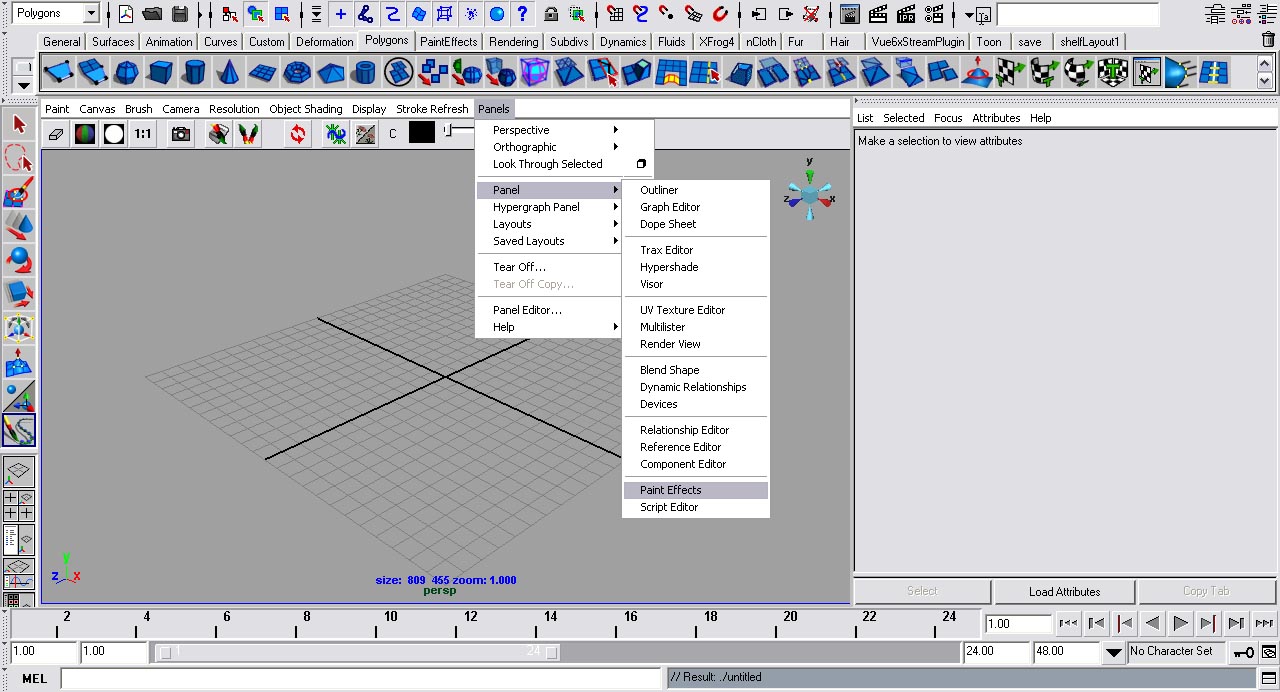
Step one - On the view port menu bar, go to panels>panel>paint effects.click to enlarge

Step two - Still on the view port menu bar, go to paint>paint canvas.
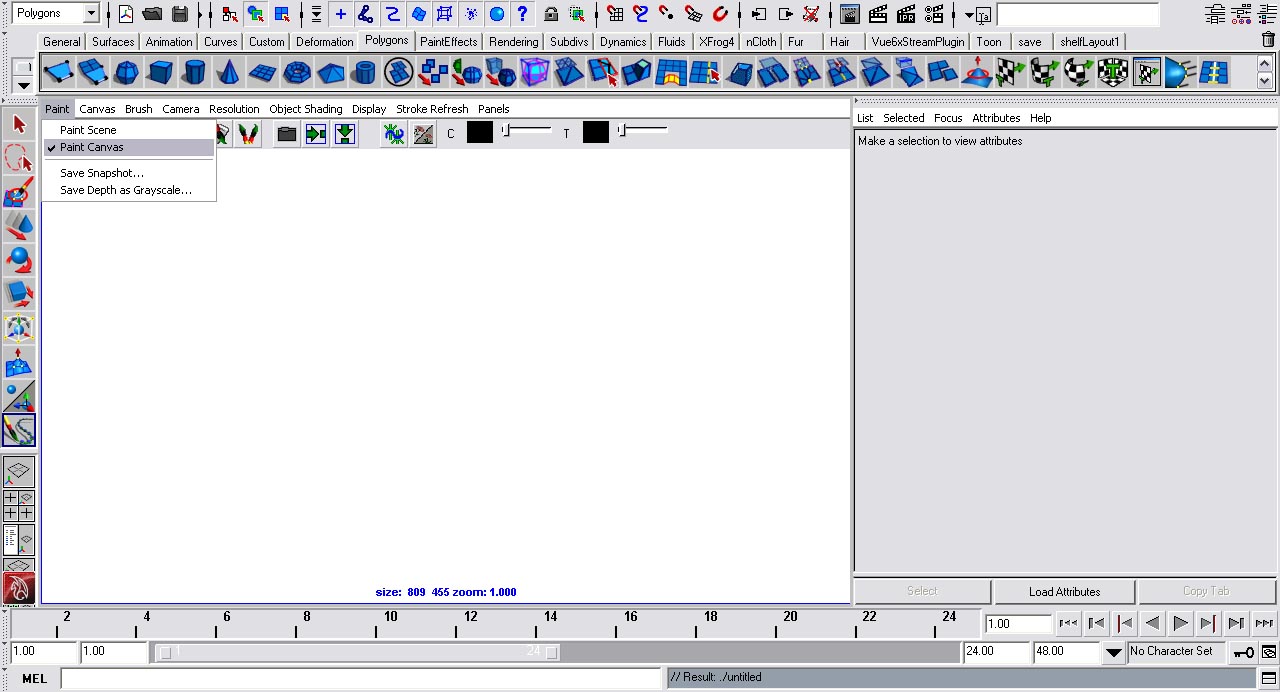
click to enlarge
Step three - Set the shelf to paint effects.

Painting

Select the tree brush on the shelf.
click to enlarge
Basically what we're going to do is scribble all over the image until it's completely covered with trees.
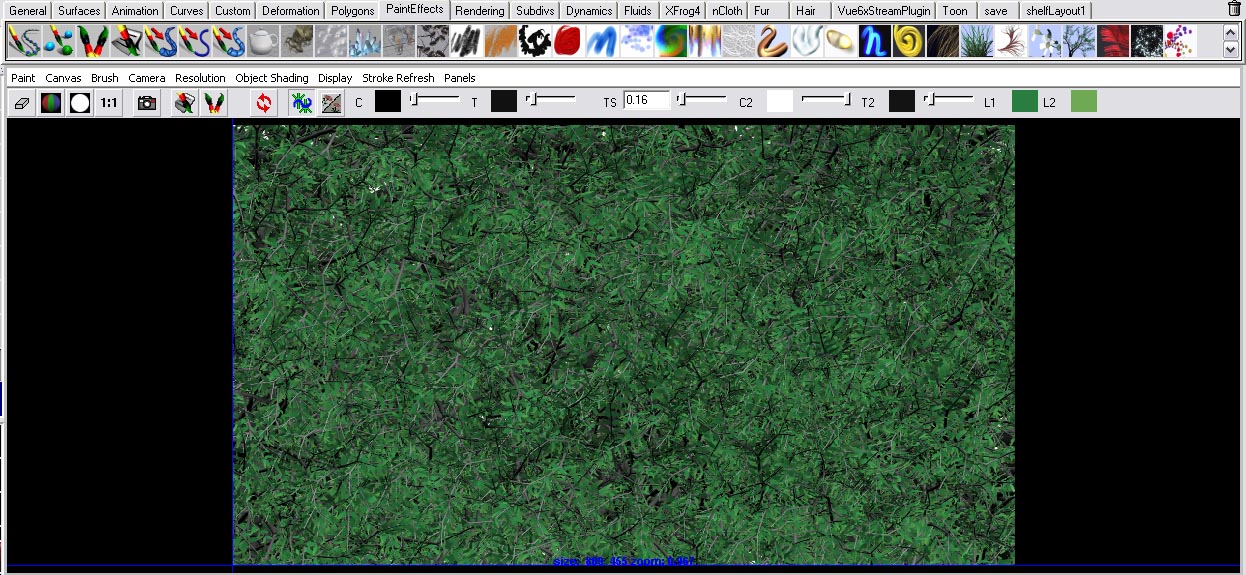
click to enlarge
We're going to erase one third of the top of the image. To get the Erase Paint Effects brush, open the visor.
click to enlarge
Go to the folder Airbrush and select the erase brush. The erasing doesn't have to be even or 100% accurate.

Now we're going to add clouds to where we erased our background. Still in the visor, go to the clouds folder and select the Cumulus Cloud Brush. Draw a couple of clouds in the white area.
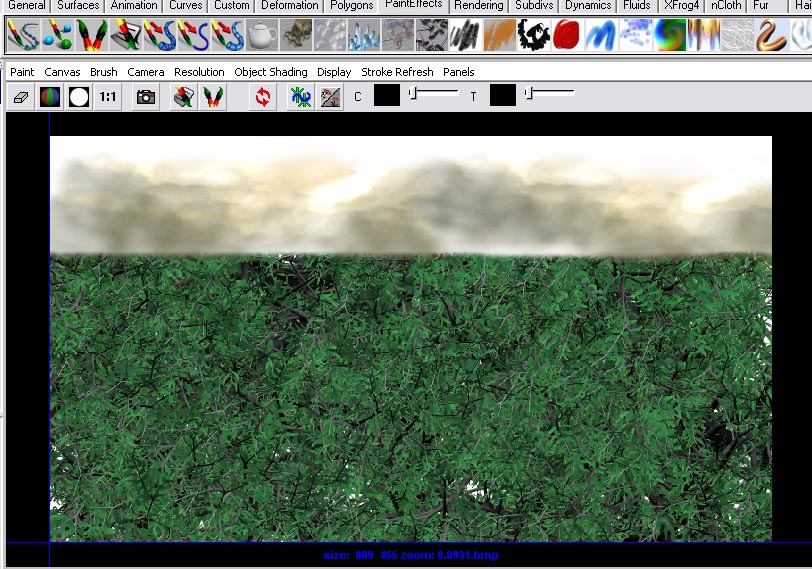
click to enlarge
Now that we have our image, on the Paint Effects Canvas menu set, go to paint>save snapshot. Save the file on your hard-drive.

Step Back

I would like to step back here and explain how this same technique can be used to generate panoramic images that can be used in Mental Ray outside this tutorial.

By just changing a couple of brushes (instead of a tree brush use a building brush), you can completely change the image you are creating. There's a tutorial on my website that can explain how to take that image into the mentalrayIblShape and then use it to generate light. But in this tutorial we're using it to generate Final Gather.


Setting Up The Scene

Of course, we're going to create a new scene all together.

Step one - Create a polygonal plane by going to create>polygonal primitives>plane. Scale it large enough so it fits your scene.

Step two - Create a sphere. Scale it larger than the plane. We'll be projecting our image we created on this.

Step three - Import any models that you want to light using this rig. For best results assign them to a Lambert shader.

Step four - Select your polygonal plane, right click and hold and go to vertex mode. Move the vertex so it looks like the picture.
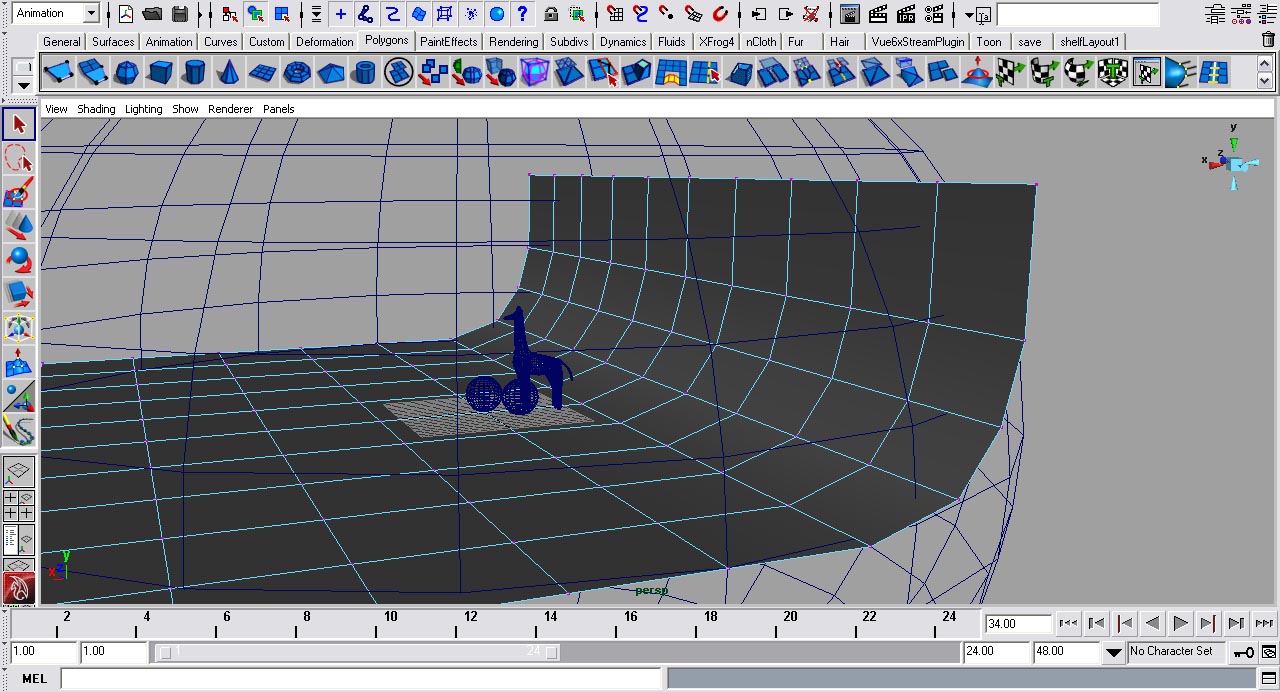
click to enlarge

Render Settings

Getting the proper render setting is very important for getting this lighting tutorial to work. We'll be using Mental Ray as our rendering software.

Step one - Open the Render Setting window.
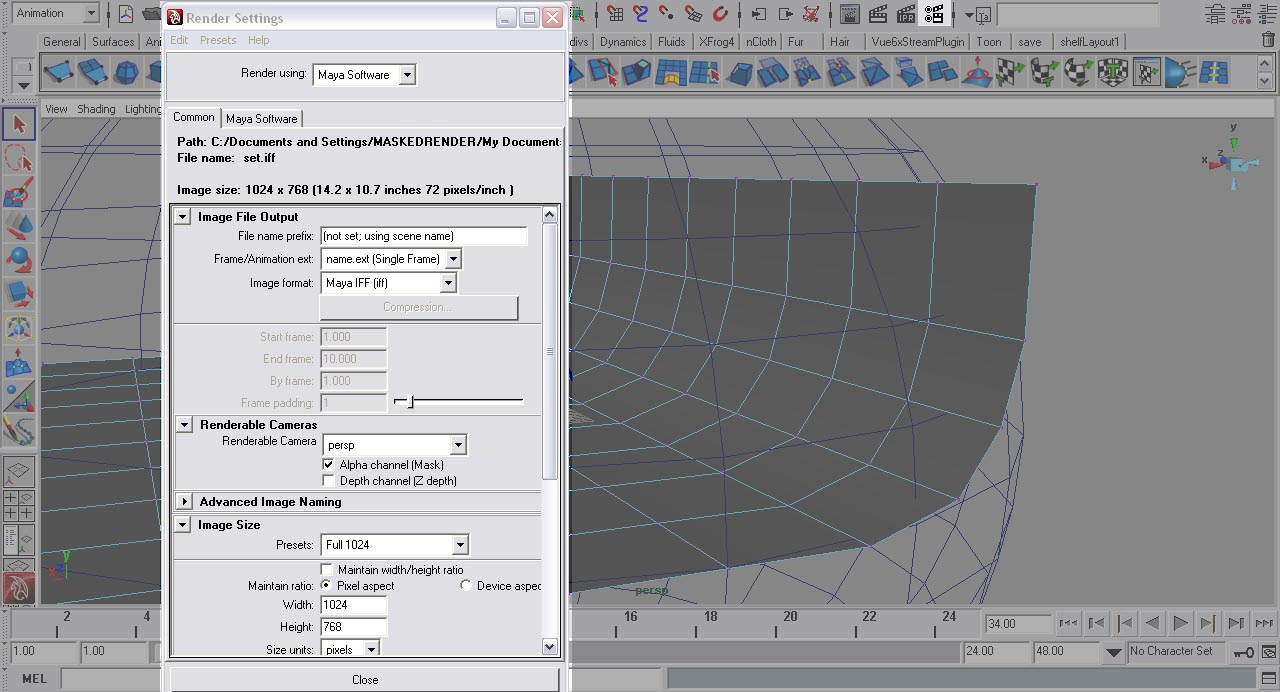
click to enlarge
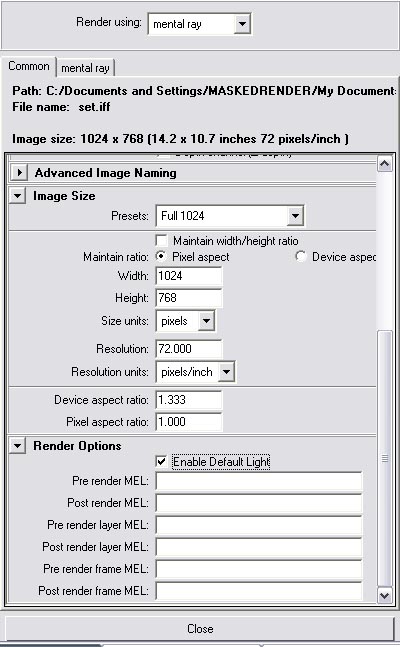
Step two - On the Common tab, go to the tag render options and uncheck Enable Default Lighting.

Step three - Set the Render Using attribute to Mental Ray.
click to enlarge
Step four - Go to the Mental Ray tab and set the quality present to production. Under Secondary Effects, check Final Gather.

Step five - Roll down and find the Final Gather tag.

Step six - Set the accuracy to 200 and the point density to 1.

Step seven - Close the render settings window.

Setting Up The Sphere

We're going to create a custom shader for the sphere that has the paint effects image attached to it. Change the shelf to rendering.

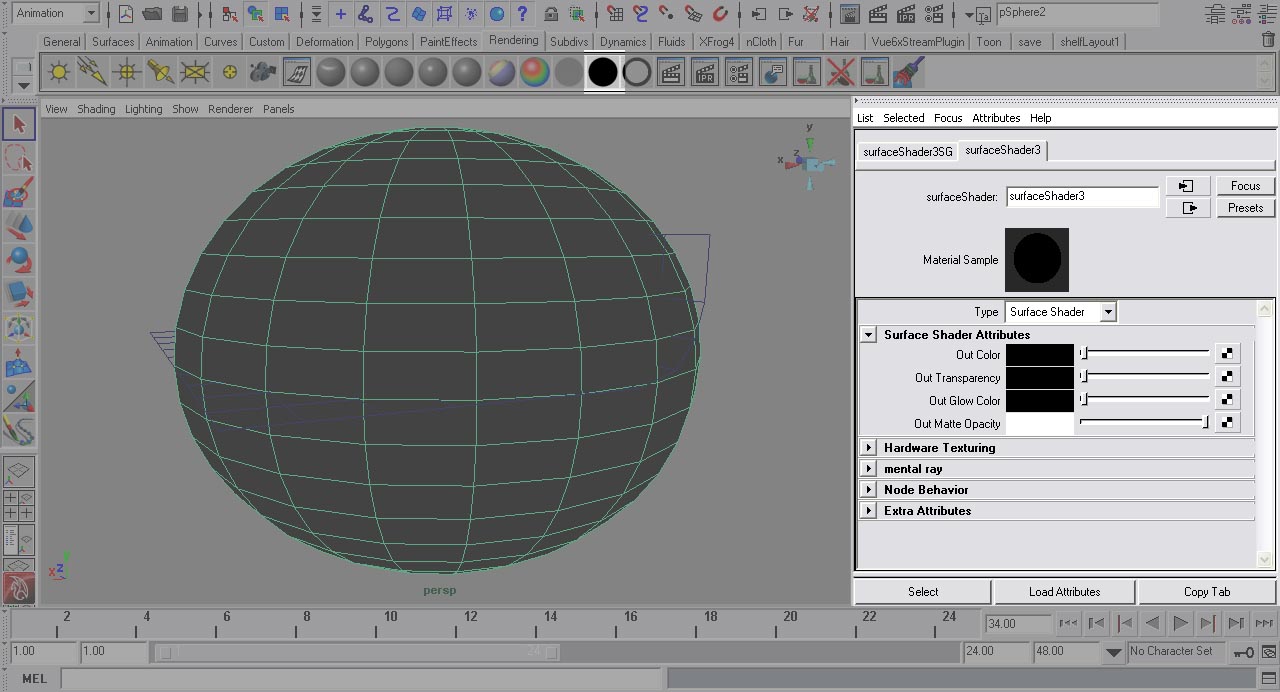
Step one - Select the sphere and create surface shader material from the rendering shelf.
click to enlarge
Step two - If this doesn't automatically open the attributes editor, open it now. Under the pShpereShape1 tab, roll down to render stats. Uncheck primary visible. Now go to the surfaceShader1 tab.

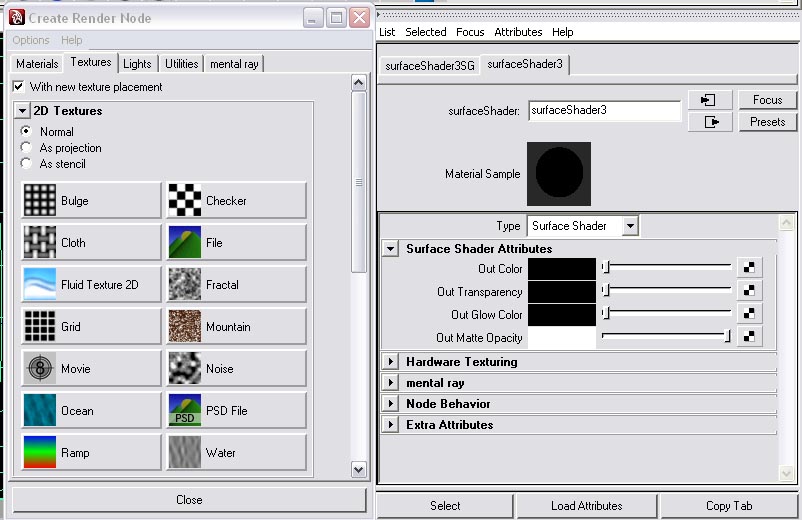
Step three - Click the checker icon beside the out color text. This will open the Create Render Node window.

Step four - With the Create Render Node window open, we're going to create a file node.
click to enlarge
Step five - Beside the text Image Name, click the folder icon. Locate where you saved the paint effects image.

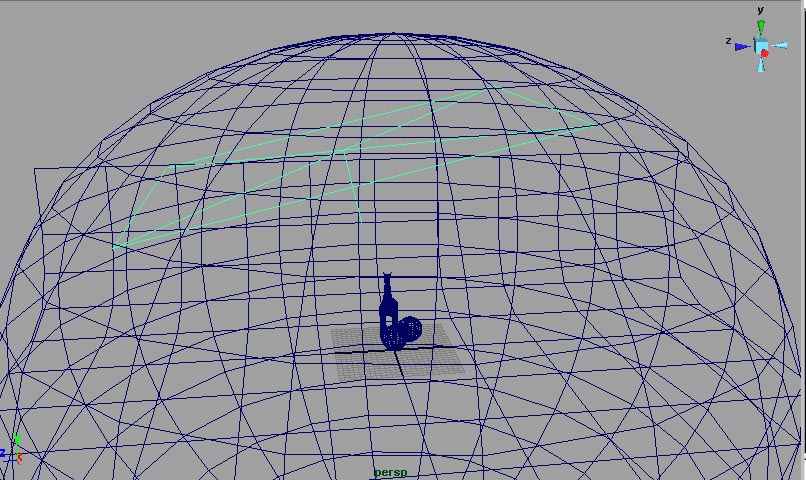
Step six - We're going to create a very large area light. Click the area light icon on the shelf.

Step seven - Scale and move the area light until it matches the image.
click to enlarge

Setting The Area Light's Attributes

Select the area light and open the attributes editor (window>attributes editor).

Step one - Set the color to a very light yellow. I set it to H=66.91, S=0.191, V=1.0.

Step two - Roll down until you find the tag Shadows and then raytrace shadow attributes.

Step three - Check use ray trace shadows. Set the shadow rays to 20 and the ray depth limit to 5.

Light Shape

This is what makes the area light create a soft and even light across the scene in Mental Ray.

Step one - Find the tag Mental Ray and then area light In the area light's attributes.

Step two - Check use light shape.

Step three - Set the type to rectangle, the high samples to 100, the high sample limit to 40, and the low sample to 40.

Okay, all that's left to do is hit render.

Conclusion

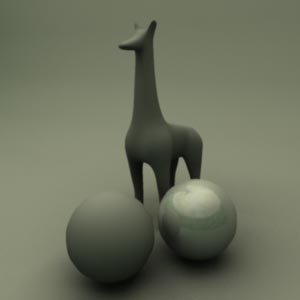
This lighting rig is a great rig for showing off a product or a model. You can use this technique and fine tune it to your needs.
click to enlarge

Autodesk Maya: Lighting and Rendering

Creating A Halftone In Maya 

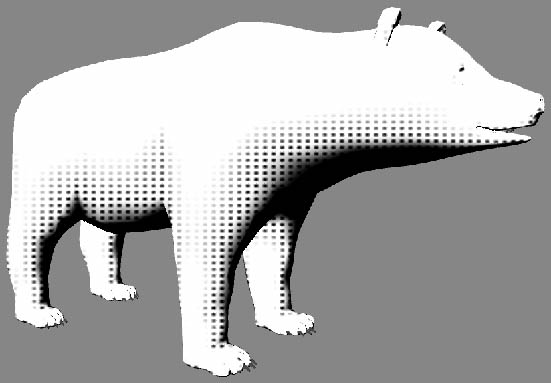
This tutorial will teach you how to create a halftone pattern effect inside Maya. 

Set-up

First, open the object you want to assign the shader to.


Set the camera's background color to gray so the effect
can be viewed easily.

click to enlarge
Create a directional light in the scene. It should be shining
downwards from behind the camera.

click to enlarge

Shader


Step one - Select your model.


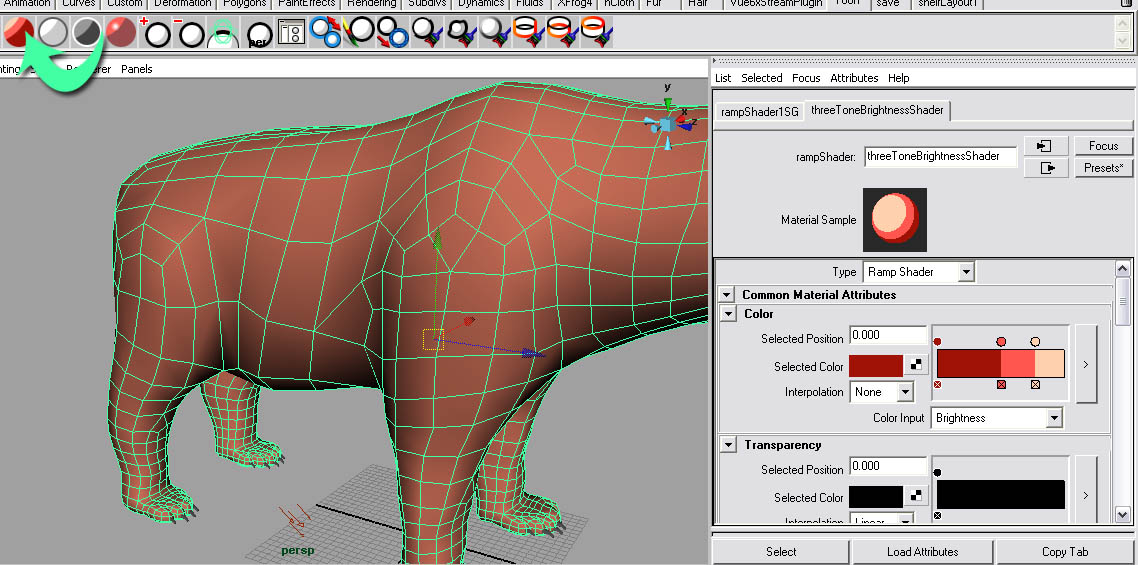
Step two - Go to the Toon shelf.


click to enlarge 
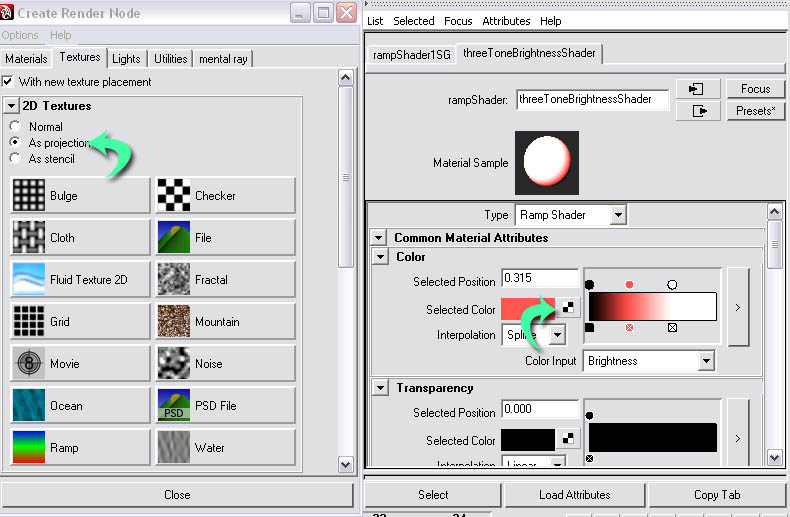
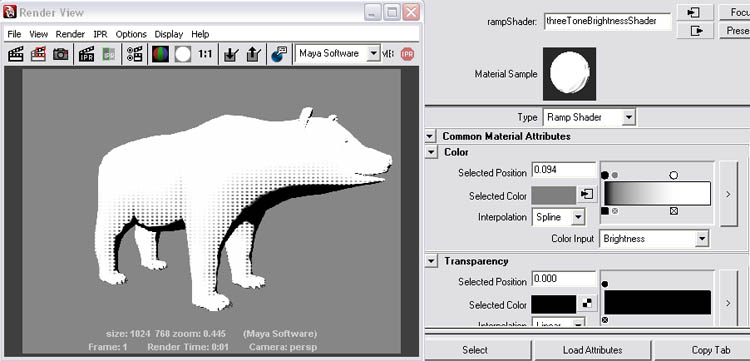
Step three - Create a threeToneBrightnessShader.

click to enlarge
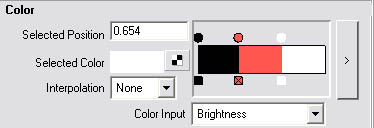
Step four - We need to change the color ramp. Set the first color to
white and the last color to black. Don't bother with the second color
because we'll be assigning a texture to that later.

click to enlarge
Step five - Set the interpolation to spline on all of the colors.
click to enlarge
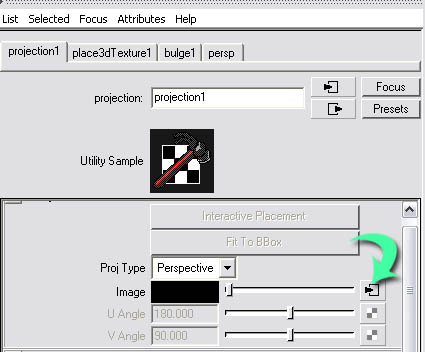
Step six - On the center color, connect the texture.
Check "as projection" and select bulge.

click to enlarge
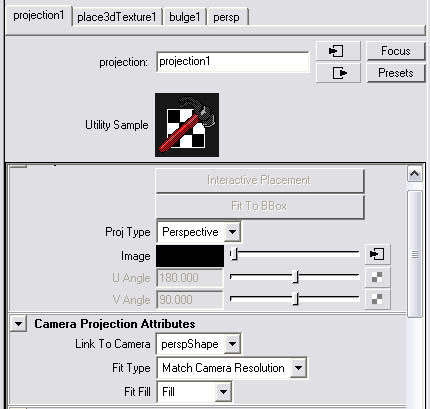
Step seven - Set the proj type to perspective. Set the link to camera
to perspShape, and fit type to match camera resolution. Now the
texture's projection is based on the camera, not the UVs.

click to enlarge
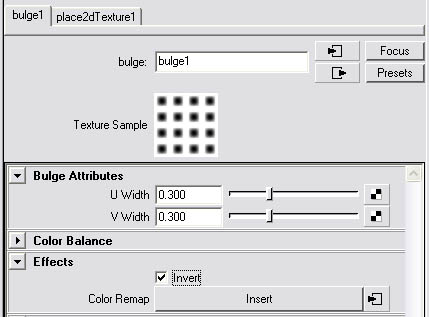
Step eight - Click over to your bulge texture.

click to enlarge
Step nine - Set the U and V width to .3 . Also, roll down to effects
and check invert.

click to enlarge  
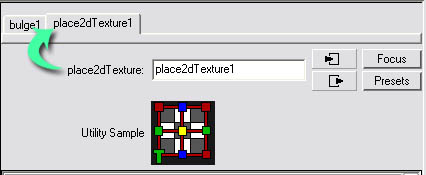
Step ten - Go to the place2DTexture node.

click to enlarge
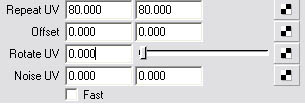
Set the repeat U and V to 80.

click to enlarge
Now render.

click to enlarge
You can tweak the shader by adjusting where the color points are
on the ramp, also adjusting the light angle.

click to enlarge
Good luck.

Creating Glass Shatter Effect using Maya nCloth

In this tutorial will explore using Maya ncloth to create Glass Shattering Effect.

Step : 1 - Let’s start by creating a polygonal plane with the default setting

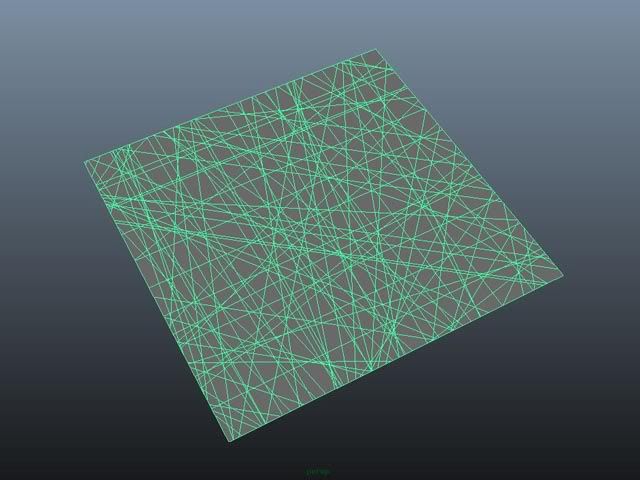
Step : 2 - Using the cut face tool cut the plane randomly,
Depending on the chunks you need…something like this

Step : 3 - Select the Plane , Polygon -->Mesh -->Triangulate

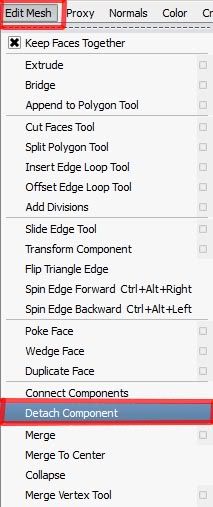
Next, select all the Edges & detach component, Edit Mesh -->Detach Component.

With this all the vertex / edges will be spiltted
Step : 4 - Select the Plane and make it a nCloth Mesh. Then,
nDynamics --> nMesh --> Create nCloth

by doing, nclothShape node and nucleus node will be created for the Plane.
In the nucleus node, set the gravity value to '0'.

Step 5 : - Extrude the plane by selecting all the face, to make it thicker like a glass material

Step :6 - Create a Sphere and make it a Passive Collider

 Next Translate in Y : 1 and set  a Key  at frame 1

At frame 24 set key to Translate Y : -1
Now the sphere is animated in Y direction.
Before playing the animation ,select both the objects , create New  ncache
Ncache --> create New  ncache
That’s it…
Play the animation…use mental ray dielectric Material as a glass shader….

Final Output :


I hope you all like this post.

Saturday, December 11, 2010

Release your inner chemist with Maya - Scene Setup - 2

Step 31

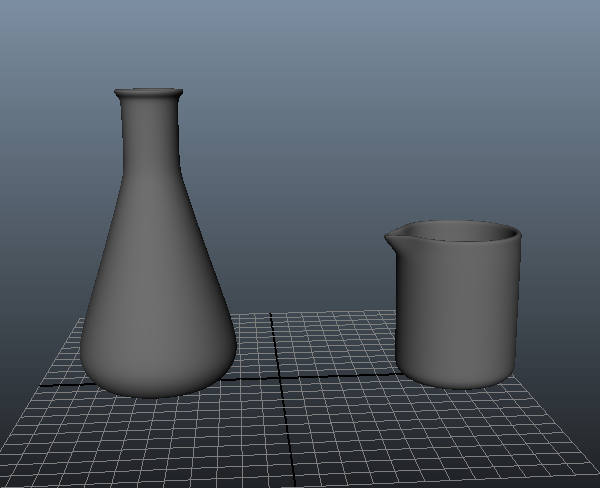
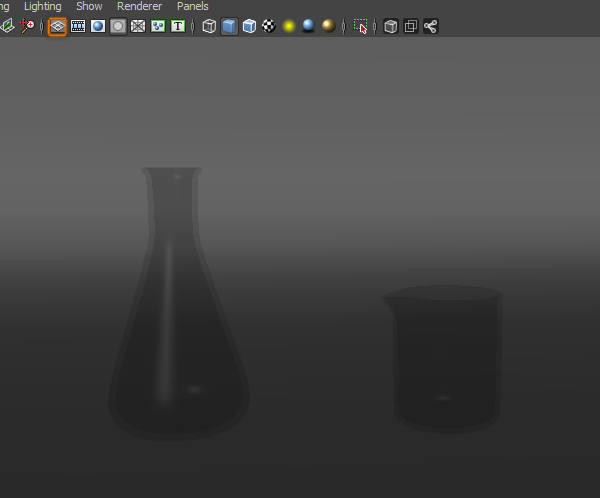
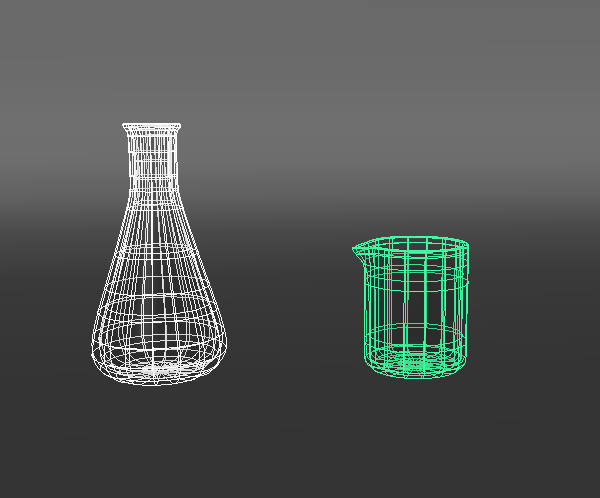
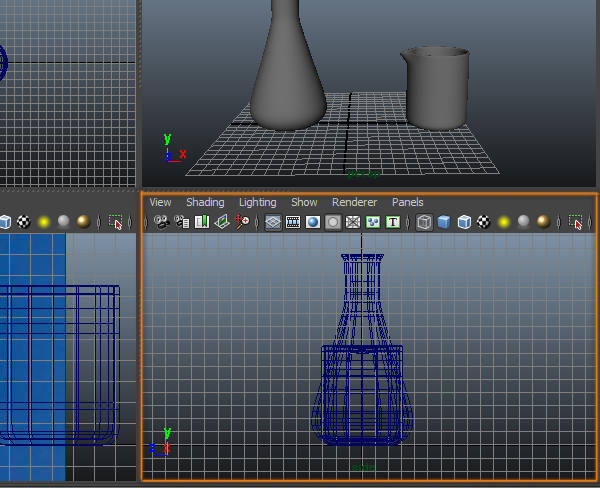
This is how both containers look.

Step 32

Make sure both containers are at the same distance from the floor.


Step 33

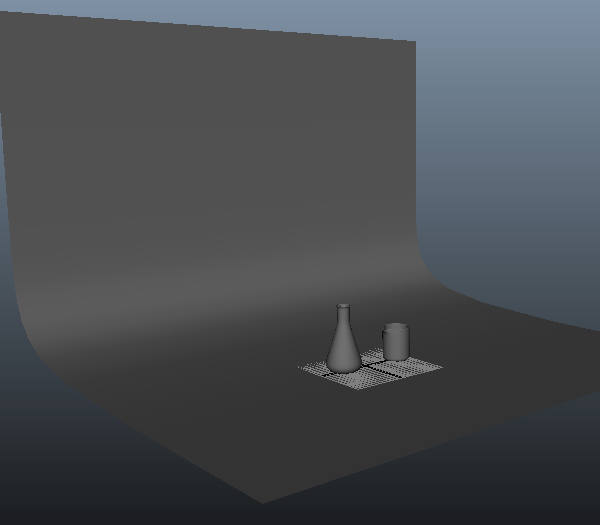
Create a background for our scene, any background can work.

Step 34

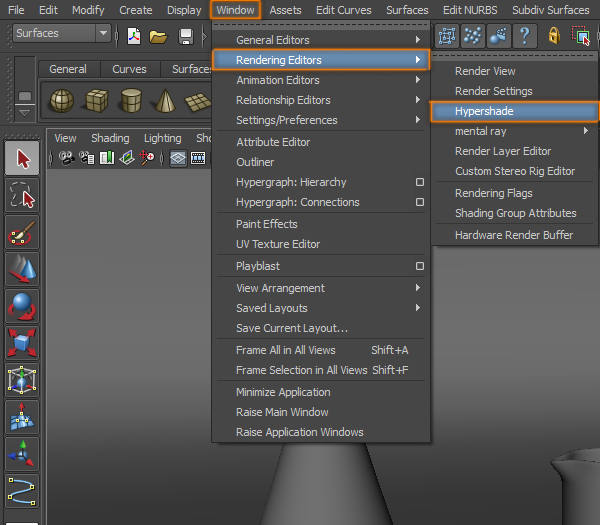
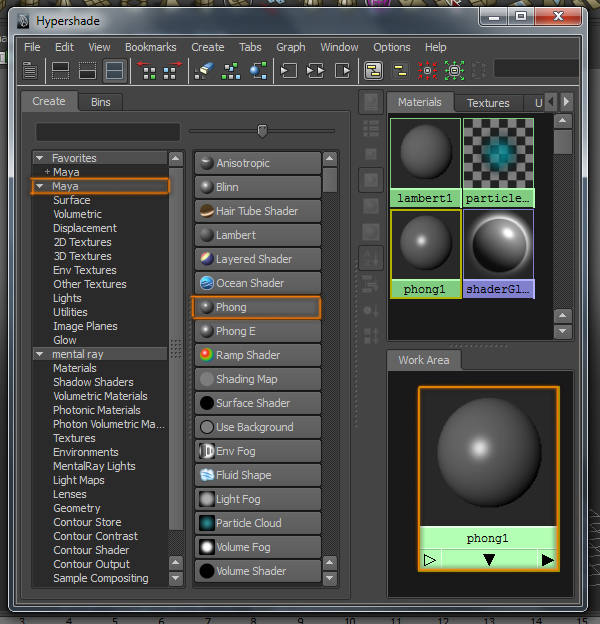
Go to “Window > Rendering Editors > Hypershade”.

Step 35

Inside the Hypershade, create a new Phong material.

Step 36

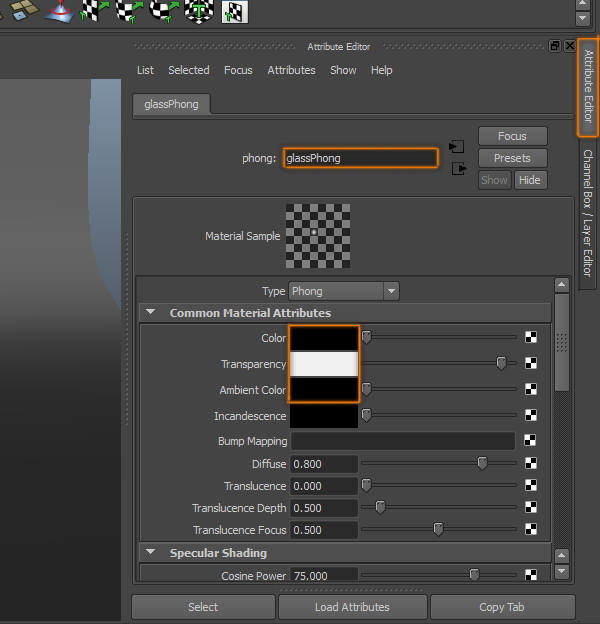
Open the Attribute editor of the phong material, add a name to it, change the color to black, the transparency to a white grey and the Ambient Color to black.

Step 37

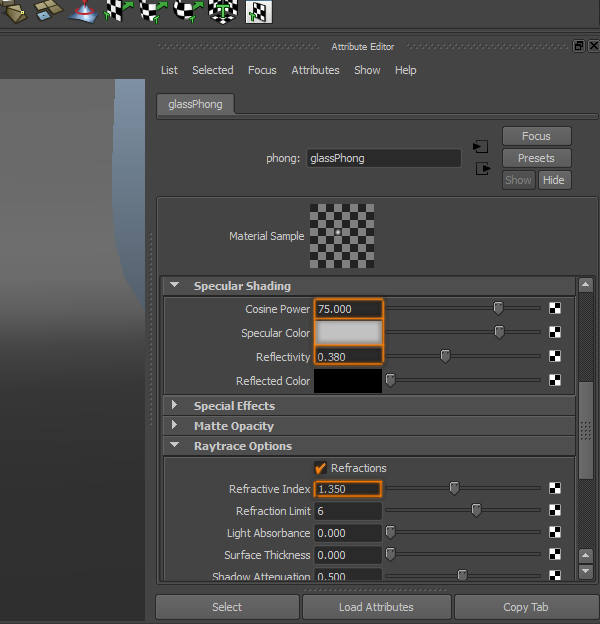
Scroll down to the “Specular Shading” section. Change the “Cosine Power” to 75, the “Specular Color” to grey, and the “Reflectivity” to 0.380.

Step 38

Add that phong material to our containers.

Step 39

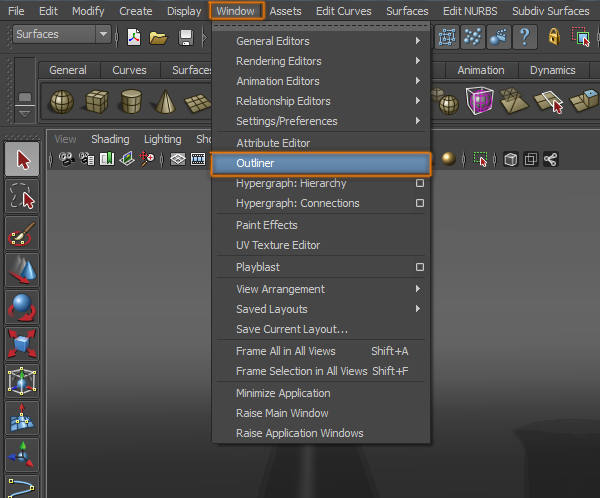
Go to “Window > Outliner”.

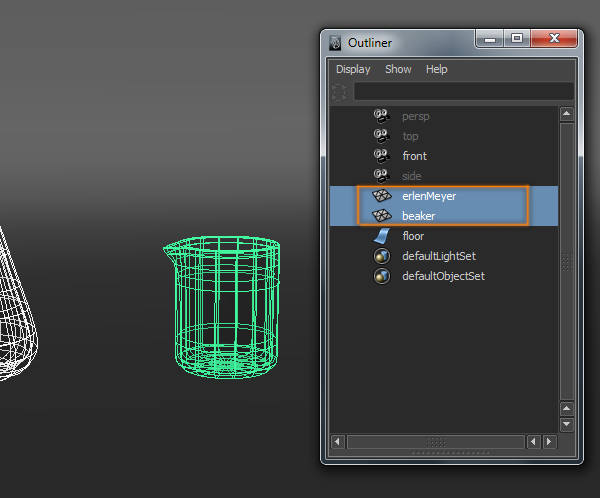
Step 40

Name both containers. This is just to have an organized scene.

Step 41

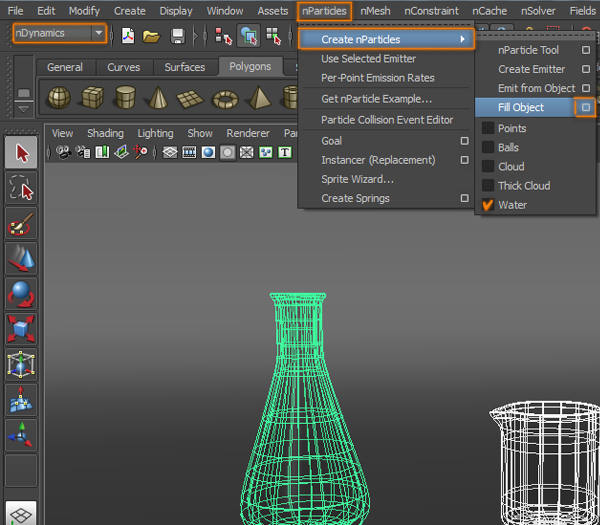
Select both containers.

Step 42

At the “nDynamics” menu, go to “nParticles > Create nParticles > Fill Object (option box)” make sure “Water” is selected”.

Step 43

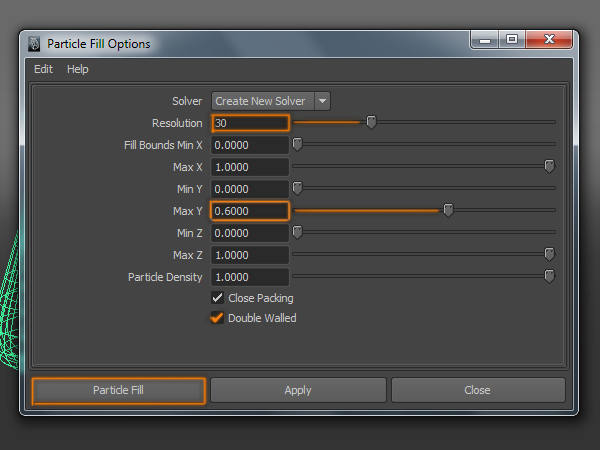
A window with nParticles options will show up, increase the resolution to 30, and the “Max Y” to .6, make sure “Double Walled” option is checked. (the “Max Y” option determines how full the container is, note that the water will compress, so this value will be at least half).

Step 44

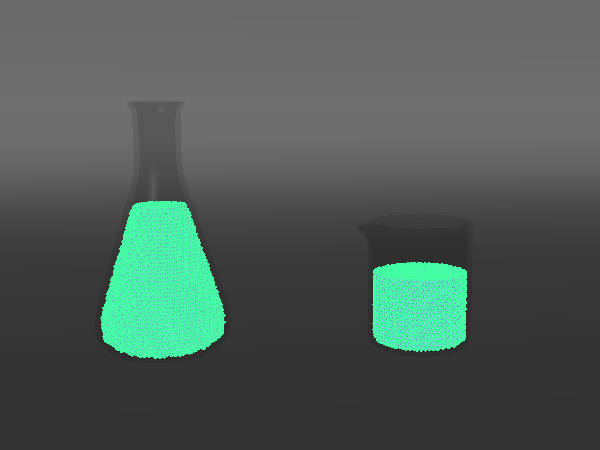
When you click on particle fill, both containers should have the same particle system inside.

Step 45

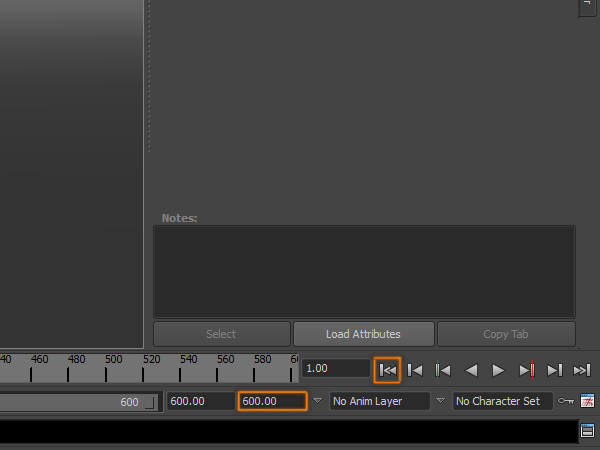
Make the scene at least 600 frames long, and rewind the animation.

Step 46

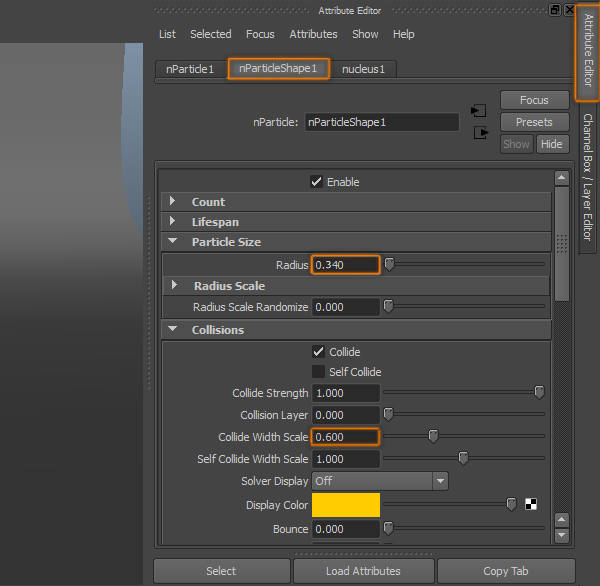
Select the nParticle system, go to its Attribute editor, increase the “Radius” to .340 (this will vary depending on the size of your scene), under the “Collisions” section, change the “Collide Width Scale” to 0.600, this will compress the particles creating more realistic water.

Step 47

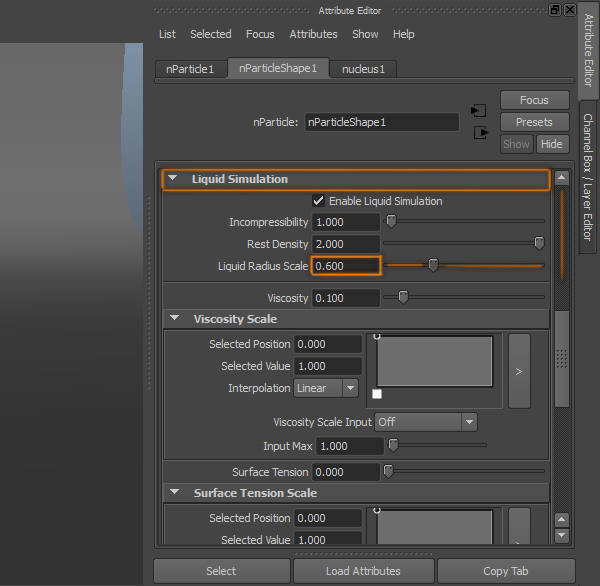
Scroll down to the “Liquid Simulation” section, and change the “Liquid Radius Scale” to 0.600.

Step 48

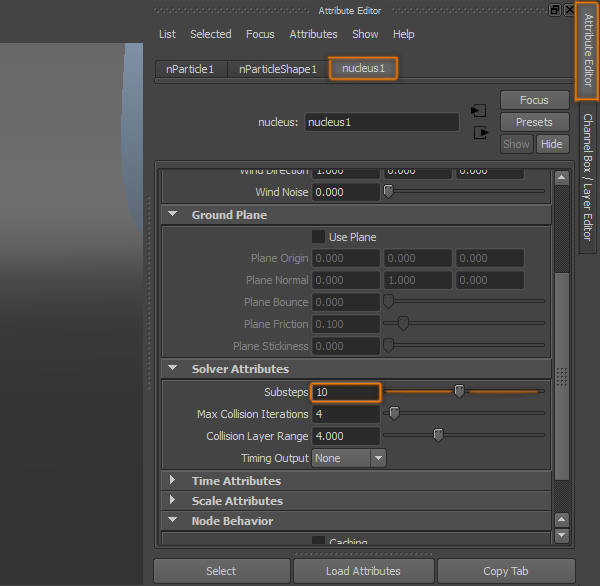
Go to the nucleus options, and increase the “Substeps” to 10.

Step 49

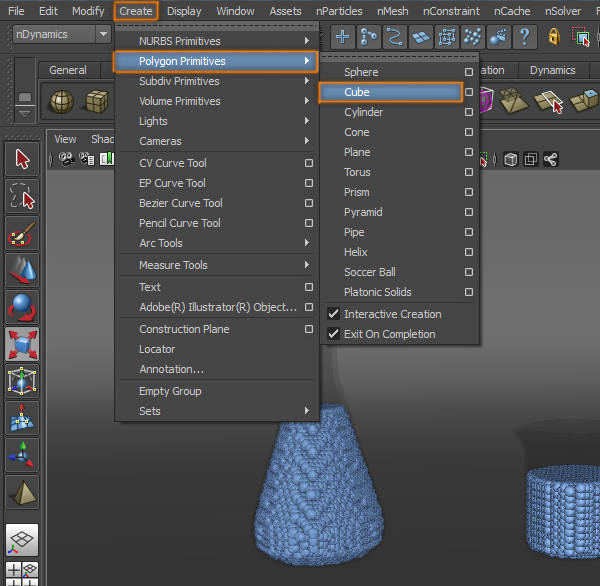
Go to “Create > Polygon Primitives > Cube”.

Step 50

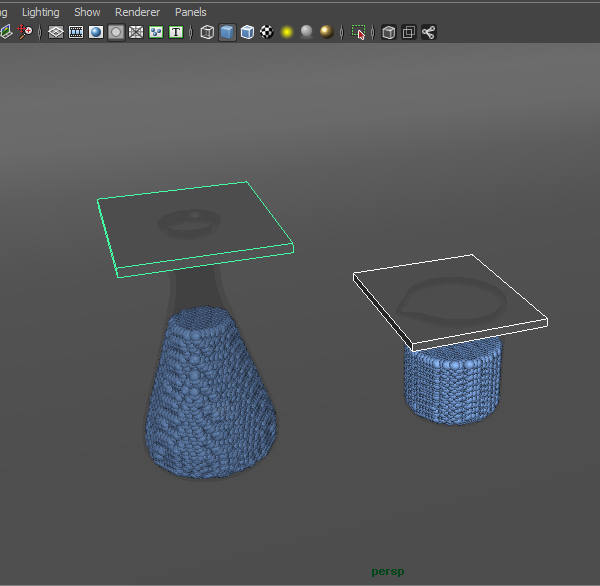
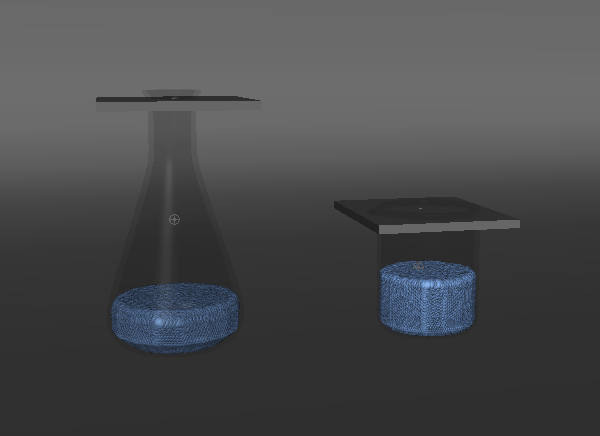
Create 2 cubes and move them on top of our containers, they will act as a cap, for the water not to go out of the containers.

Step 51

Select both containers and caps.

Step 52

At the “nDynamics” menu, go to “nMesh > Create Passive Collider”. This will make the objects collide with the nParticle system.

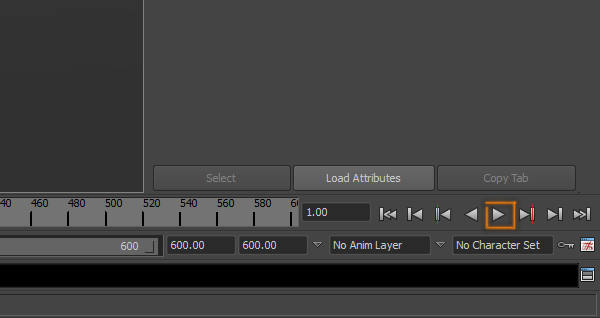
Step 53

Play the animation (it will play really slow).

Step 54

Stop the playback when all particles settle down, and they are not moving. (Note particles compressed during the playback)

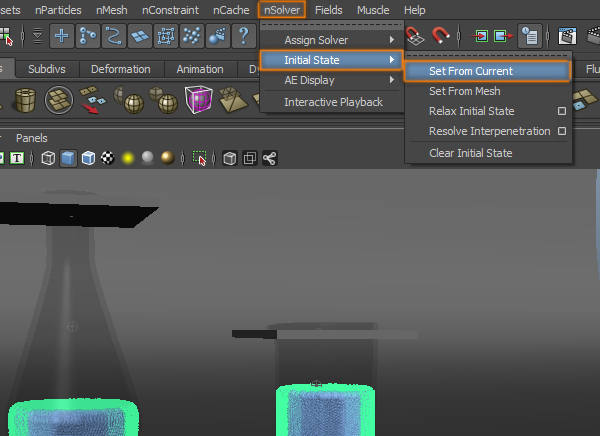
Step 55

Select the nParticle system, and go to “nSolver > Initial State > Set From Current”. This will make the water stay in the same position the whole animation, unless something interacts with it.

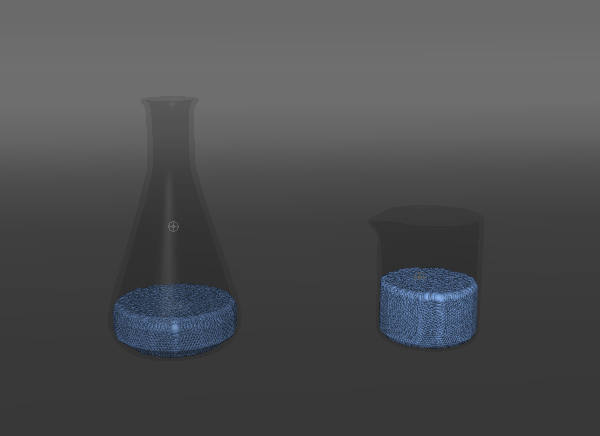
Step 56

Delete the cubes we created before.

Step 57

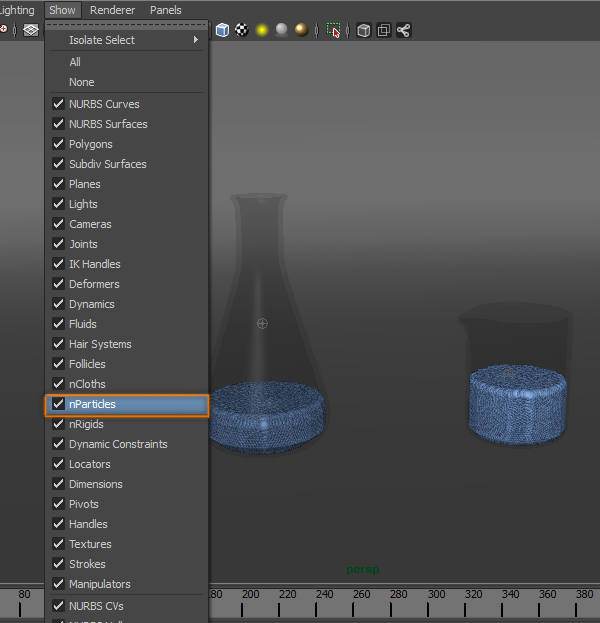
At the view menu, go to “Show > nParticles (uncheck that option)” this will hide the water, and allow us to create the animation of the container faster.

Step 58

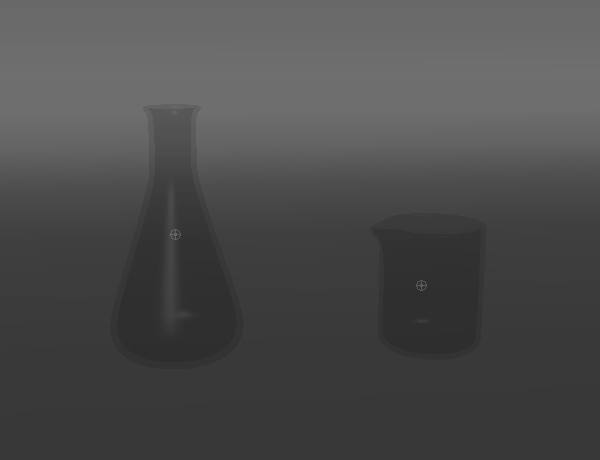
The water should not be visible.

Step 59

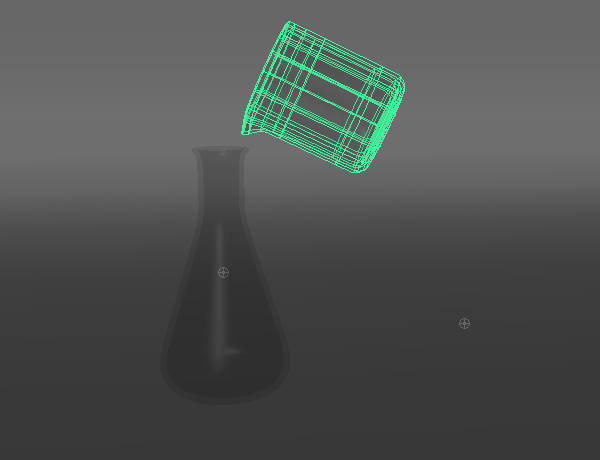
Animate the container.

Step 60

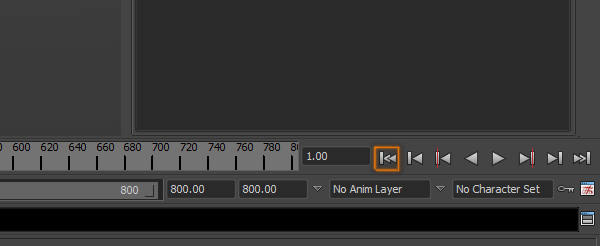
Rewind the animation.

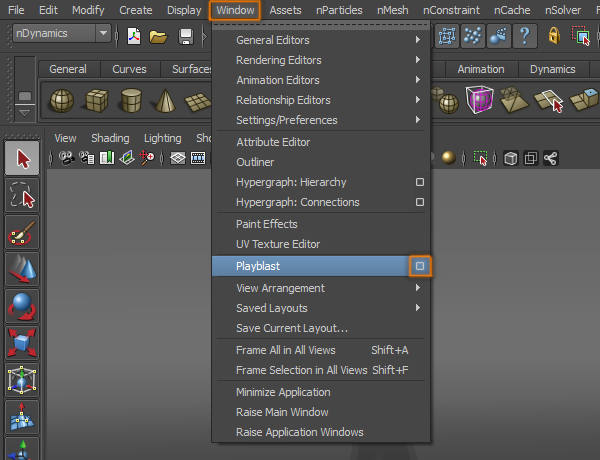
Step 61

Make sure to make visible the water again, go to “Window > Playblast (option box)”

Step 62

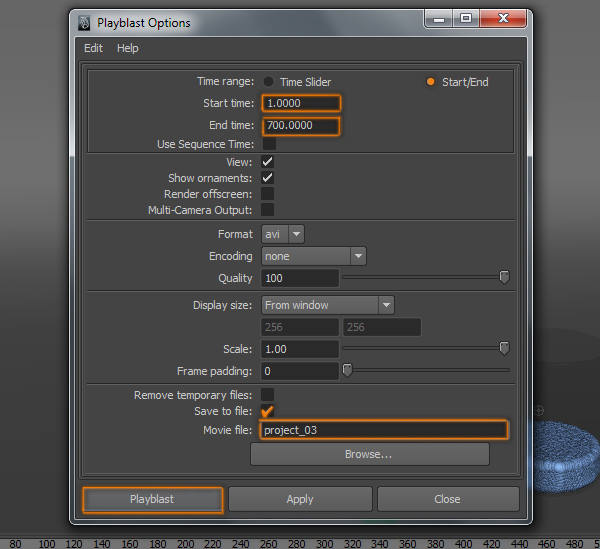
Select the time range where your animation takes place, and where do you want to save the file. Click on playblast.


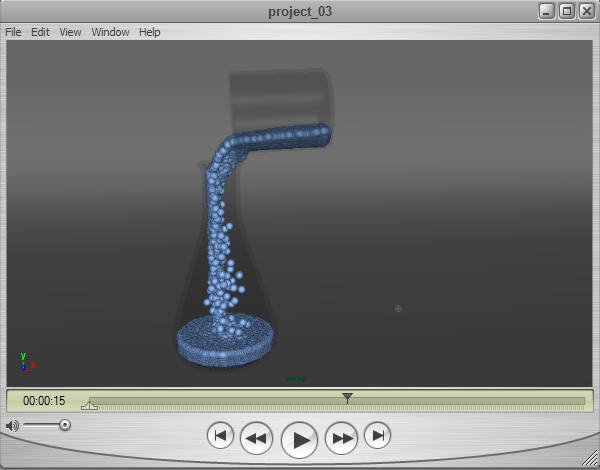
Step 63

This will create a file with the animation. Check that the water is doing what you want it to do. If not, adjust the container animation and do another playblast. I did 10 playblasts before I liked the animation.